

.webp)


Starting your eCommerce journey begins with one fundamental step: creating your Shopify account. Whether you're launching a new brand, moving from another platform, or testing the waters with online retail, understanding how to make a Shopify account properly sets the foundation for everything that follows. In 2026, Shopify remains the leading eCommerce platform for UK businesses, powering over two million stores globally with its intuitive interface and powerful features. This comprehensive guide walks you through each stage of the account creation process, from your initial signup through to accessing your store dashboard. We'll cover the essential decisions you'll face, common pitfalls to avoid, and the strategic choices that can impact your store's long-term success. Before you begin, you'll need a valid email address, business information, and a clear idea of what you plan to sell.
Understanding Shopify Account Types and Plans
Before learning how to make a Shopify account, you should understand the different subscription tiers available. Shopify offers several pricing structures designed for businesses at various stages of growth.
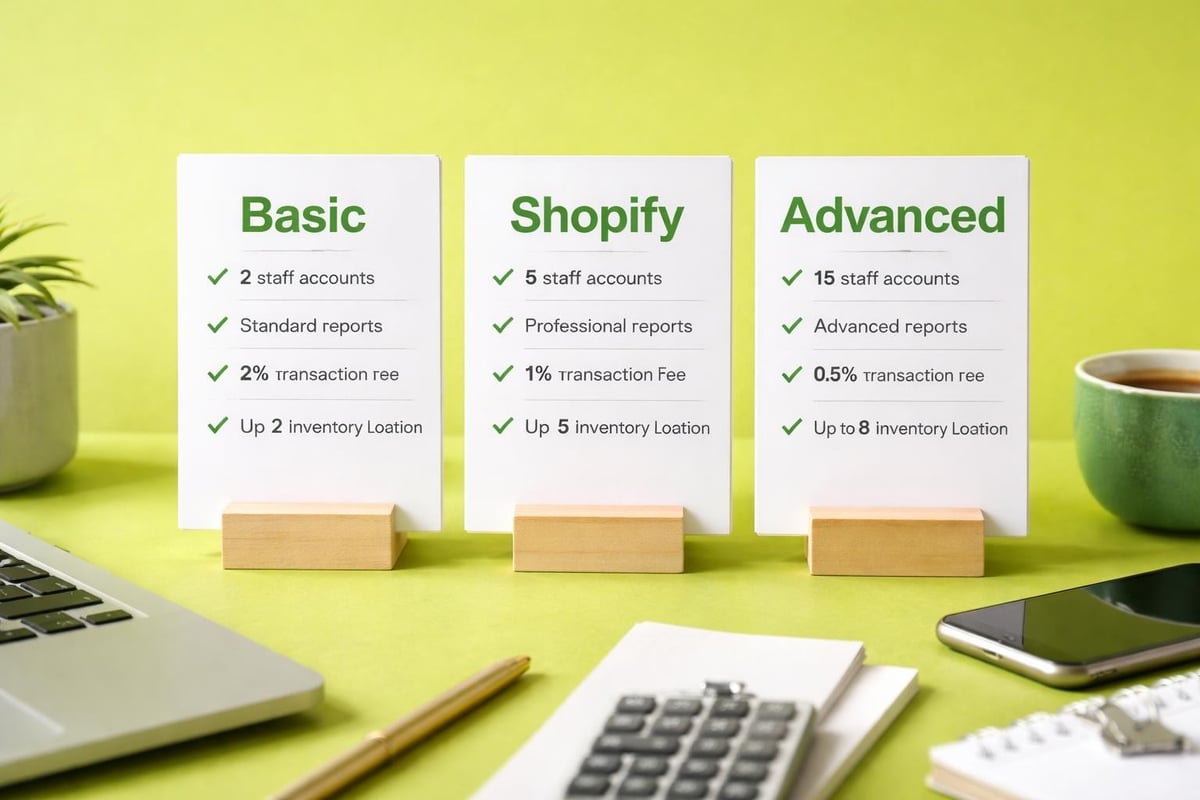
The Basic plan starts at £19 per month and includes all essential features for new stores. This tier suits solo entrepreneurs and small businesses just starting their eCommerce journey. The Shopify plan costs £49 monthly and adds professional reports, gift cards, and lower transaction fees. For growing brands, the Advanced plan at £259 monthly provides advanced reporting, third-party calculated shipping rates, and the lowest transaction fees.
Key differences across plans:
- Staff account limits (2, 5, or 15 users)
- Transaction fee percentages
- Reporting capabilities and insights
- International domain availability
- Inventory location allowances
Shopify also offers a three-day free trial followed by your first month for just £1, giving you substantial time to explore the platform before committing. This trial period allows you to build your store, test features, and import products without payment pressure. The official Shopify free trial page provides current promotional offers and lets you begin the setup process immediately.
For established enterprises, Shopify Plus provides custom pricing and white-glove support, though most UK brands start with standard plans and upgrade as they scale. Understanding these tiers helps you make informed decisions when you create your account.
Choosing Your Initial Plan Strategically
Many new merchants wonder which plan to select when they first make a Shopify account. The answer depends on your immediate needs and projected growth trajectory.
Start with Basic if you're validating a product idea, have limited inventory, or operate as a sole trader. This tier provides everything necessary to process orders, manage products, and accept payments. You can always upgrade later as your revenue increases, and Shopify makes plan changes seamless through your admin panel.
Consider starting with the Shopify plan if you're migrating from another platform with established sales volume or launching with a comprehensive product catalogue. The professional reports and lower transaction fees quickly offset the higher monthly cost when you process significant order volumes.
Step-by-Step Process to Make a Shopify Account
Creating your Shopify account takes approximately five to ten minutes when you have your information prepared. The process is straightforward, but attention to detail during setup prevents complications later.
Initial Registration Steps
Follow these numbered steps to create your account:
- Navigate to Shopify's homepage or the free trial page
- Enter your email address in the signup field
- Create a strong password (minimum eight characters with mixed case and numbers)
- Provide your store name (this generates your initial myshopify.com URL)
- Click "Create your store" to proceed
Your store name becomes part of your temporary URL (yourstore.myshopify.com), though you'll add a custom domain later. Choose something memorable and aligned with your brand, even if it's just a working title. You can modify this name later through your settings, but changing URLs after launch affects SEO and customer bookmarks.
After submitting your initial details, Shopify asks qualifying questions about your business. These questions help customize your dashboard and provide relevant resources, but they don't restrict your account capabilities. Answer honestly about whether you're selling physical products, digital goods, or services, and indicate your current selling experience level.
Setup StageInformation RequiredPurposeCan Change Later?RegistrationEmail, password, store nameAccount creationEmail requires verificationBusiness detailsProduct type, experience levelDashboard customizationYes, anytimePersonal infoName, address, phoneLegal complianceYes, in settingsPayment setupBank details, tax infoReceiving paymentsYes, but requires verification
The system then requests your personal information, including full name, address, and phone number. This data fulfills legal requirements for operating an eCommerce business and appears on customer invoices. Accuracy matters here, particularly for UK businesses that must comply with Companies House registration and VAT requirements.
Email Verification and Account Activation
After completing the registration form, Shopify sends a verification email to your provided address. Check your inbox and spam folder for this message, which typically arrives within minutes. Click the verification link to confirm your email address and activate full account access.
This verification step protects your account security and ensures Shopify can reach you regarding important notifications, order updates, and policy changes. Without completing verification, some features remain restricted, and you cannot process live transactions.
If you don't receive the verification email within ten minutes, check your spam folder or request a new verification link through your account settings. Using a professional business email address (rather than personal Gmail or Yahoo accounts) improves deliverability and presents a more professional image when communicating with customers and suppliers.
Configuring Your Store Settings After Account Creation
Once you've learned how to make a Shopify account and completed the initial signup, immediate configuration ensures your store operates correctly from day one. The settings area contains dozens of options, but focusing on essential configurations first prevents operational issues.
Critical Settings to Configure Immediately
Access these settings through Settings in your left-hand navigation:
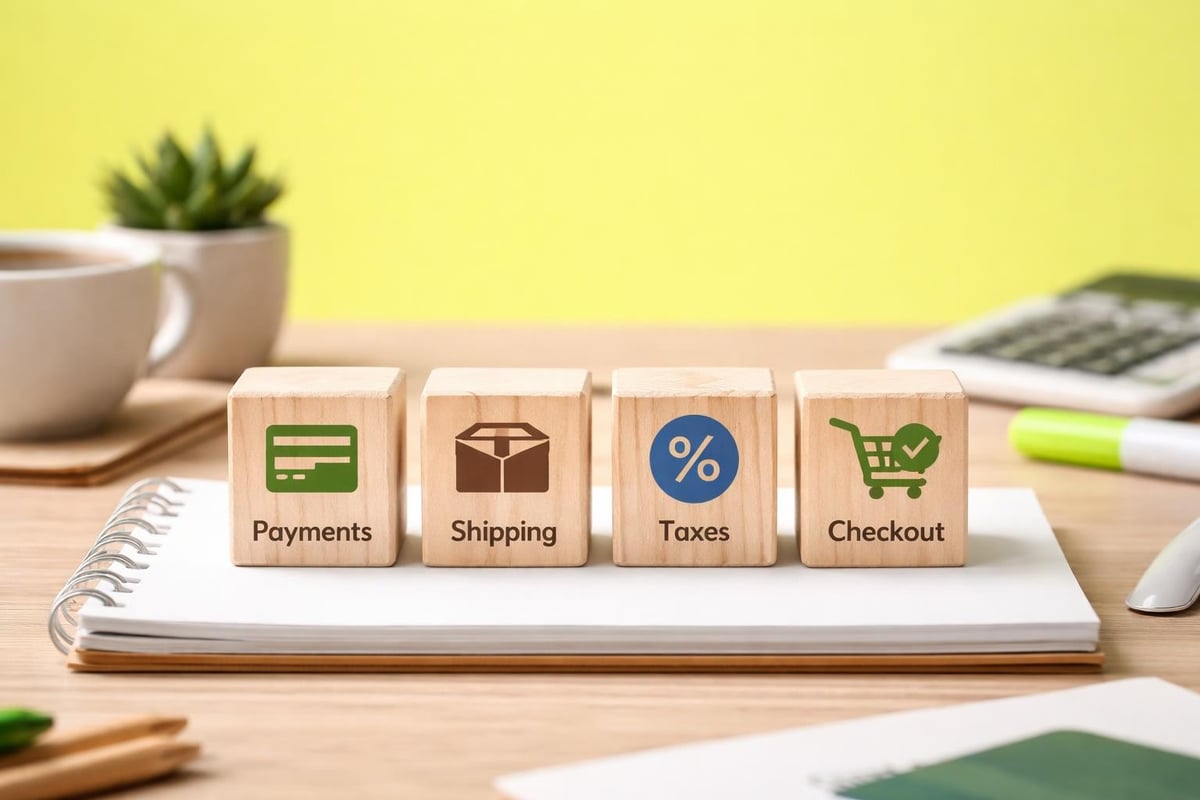
- Store details: Verify your business name, contact email, and customer support email
- Payments: Connect payment providers (Shopify Payments, PayPal, or alternative gateways)
- Shipping and delivery: Set shipping zones, rates, and delivery timeframes
- Taxes: Configure UK VAT settings and tax collection rules
- Checkout: Customize the checkout experience and required customer information
Payment configuration requires particular attention. Shopify Payments integrates seamlessly and offers competitive rates without transaction fees, but requires business verification including bank account details and identification documents. Alternative providers like PayPal or Stripe work equally well but include per-transaction fees beyond Shopify's subscription cost.
UK merchants must configure VAT correctly from the start. Navigate to Settings > Taxes and duties, enable "Charge VAT on sales," and input your VAT registration number if applicable. Shopify automatically calculates VAT on qualifying orders, but you remain responsible for filing returns with HMRC. For businesses below the VAT threshold (£90,000 in 2026), you can disable VAT collection initially.
Shipping settings determine customer satisfaction and profit margins. Create shipping zones for the UK, Europe, and international markets, then assign rates based on order value, weight, or flat fees. Many successful UK stores offer free shipping above a threshold (typically £50-£75) to increase average order values whilst maintaining margins.
Adding Your First Products and Collections
With foundational settings configured, you can begin adding products to your catalogue. Navigate to Products > Add product to access the product creation interface. Each product requires several essential fields that impact both customer experience and search visibility.
Required product information includes:
- Product title (clear, descriptive, keyword-rich)
- Description (benefits, features, specifications, use cases)
- High-quality images (minimum 2000x2000 pixels recommended)
- Pricing (compare-at price, cost per item, profit margin)
- Inventory quantities and SKU codes
- Product weight (for shipping calculations)
Write product descriptions that sell benefits rather than just listing features. Explain how products solve customer problems, include sizing information, care instructions, and any relevant certifications. Rich, detailed descriptions improve conversions and provide content for search engines to index. For visual guidance, this YouTube tutorial on setting up a Shopify account demonstrates the product addition process in detail.
Collections organize products into logical categories that customers can browse. Create collections based on product type, season, price range, or customer needs. Manual collections allow you to hand-pick products, whilst automated collections use conditions (tags, price, inventory level) to populate themselves dynamically.
Customizing Your Store Design and Theme
Your store's visual presentation significantly impacts customer trust and conversion rates. After you make a Shopify account, selecting and customizing a theme becomes your next priority. Shopify's theme store offers both free and premium options, each with different layouts, features, and customization capabilities.
Selecting an Appropriate Theme
Free themes like Dawn, Sense, and Studio provide excellent starting points for new stores. These themes include responsive design, fast loading speeds, and essential eCommerce features without upfront costs. They're regularly updated by Shopify and maintained to current web standards.
Premium themes (£100-£300 one-time fee) offer more sophisticated layouts, additional customization options, and unique features like advanced filtering, lookbooks, or product customizers. Investing in a premium theme makes sense when you have specific design requirements or want capabilities beyond basic themes.
When evaluating themes, consider these factors:
CriteriaWhy It MattersWhat to Look ForMobile responsiveness70%+ of UK shoppers browse on mobileTouch-friendly navigation, readable text sizesPage speedAffects SEO rankings and conversionsOptimized code, lazy loading, minimal scriptsProduct page layoutDrives purchase decisionsMultiple image views, clear CTAs, space for descriptionsCustomization depthMatches your brand identityColour controls, font options, section flexibility
After selecting a theme, access the theme editor through Online Store > Themes > Customize. The visual editor allows you to modify layouts, colours, typography, and content without coding knowledge. Add your logo, adjust brand colours, and configure homepage sections to showcase featured products, collections, or promotional content.
Many UK brands working with a Shopify web design agency opt for custom theme development that perfectly matches their brand guidelines and provides unique functionality. This approach costs more upfront but delivers differentiation in competitive markets and often achieves higher conversion rates through purpose-built user experiences.
Essential Pages to Create Before Launch
Beyond your product catalogue, several standard pages establish credibility and meet legal requirements. Create these pages through Online Store > Pages:
- About Us: Share your brand story, values, and what makes you different
- Contact: Provide multiple contact methods (email, phone, social media)
- Shipping Policy: Explain delivery timeframes, costs, and international options
- Returns and Refunds: Outline your returns process and timescales (UK law requires 14-day cooling-off period)
- Privacy Policy: Detail how you collect, use, and protect customer data (GDPR compliance)
- Terms of Service: Define the legal relationship between you and customers
Shopify provides templates for legal pages, but review them carefully and adjust for your specific business practices. For UK businesses, ensure compliance with Consumer Contracts Regulations, GDPR, and any industry-specific requirements. Adding these pages before launch prevents legal issues and builds customer confidence.
Link these pages in your footer navigation so customers can easily access them. The Coursera guide on setting up a Shopify store provides additional context on creating compelling page content that converts visitors.
Setting Up Domain and Email Configuration
Your myshopify.com subdomain works functionally but appears unprofessional to customers. Connecting a custom domain (yourstore.co.uk) significantly improves brand perception and trust signals. You can purchase domains directly through Shopify or connect existing domains from providers like 123-Reg, GoDaddy, or Namecheap.
Purchasing and Connecting Your Domain
To buy a domain through Shopify, navigate to Settings > Domains > Buy new domain. Search for available options, with .co.uk domains typically costing around £10-15 annually. Shopify handles all DNS configuration automatically when you purchase through their platform, making setup nearly instantaneous.
If you already own a domain, connect it by selecting "Connect existing domain" and following the DNS configuration instructions. This process involves updating A records and CNAME records in your domain provider's dashboard. Most configurations propagate within 24-48 hours, though some providers update faster.
Professional email addresses (hello@yourstore.co.uk) look more credible than Gmail addresses when communicating with customers. Shopify doesn't provide email hosting, but integrates with Google Workspace (from £4.60/user/month) and Microsoft 365. Set up professional email before launch and use it consistently across customer communications, marketing emails, and support interactions.
Testing Your Store Before Going Live
Before removing password protection and launching publicly, thoroughly test every aspect of your store. This quality assurance process identifies issues that could frustrate customers or prevent sales.
Complete these test scenarios:
- Place test orders using different payment methods
- Test the checkout process on mobile devices and tablets
- Verify email notifications arrive correctly (order confirmations, shipping updates)
- Check all navigation links work correctly
- Review product pages for spelling errors and missing information
- Test discount codes if you've created any promotional campaigns
- Confirm shipping calculations match your intended rates
Create test products with £0.00 prices or use Shopify's test payment gateway to place orders without processing real transactions. Complete the entire customer journey from product discovery through checkout to post-purchase emails. This hands-on testing reveals user experience issues you might otherwise miss.
Ask friends or colleagues to browse your store and provide feedback on clarity, navigation, and overall impression. Fresh perspectives often identify confusing elements or missing information that becomes invisible when you've worked on the store for weeks.

Launching Your Store and Next Steps
When testing confirms everything functions correctly, you're ready to remove password protection and launch. Navigate to Online Store > Preferences and disable the password protection feature. Your store immediately becomes visible to the public and search engines.
Launch represents a beginning rather than an endpoint. Successful eCommerce requires ongoing optimization, marketing, and customer service. Start driving traffic through social media, email marketing, Google Ads, or content marketing. Understanding how to start a successful Shopify store extends beyond technical setup into growth strategies and conversion optimization.
Monitor your analytics through Shopify's built-in reports and Google Analytics integration. Track metrics like traffic sources, conversion rates, average order values, and customer acquisition costs. These insights inform decisions about product offerings, pricing adjustments, and marketing investments.
Consider implementing apps from the Shopify App Store to extend functionality. Essential apps often include email marketing platforms (Klaviyo, Omnisend), review collectors (Judge.me, Loox), and inventory management tools. Start conservatively with apps, as too many can slow site performance and complicate operations.
Post-Launch Optimization Priorities
After launching, focus on continuous improvement rather than perfection from day one. Collect customer feedback through post-purchase surveys, monitor support inquiries for common questions, and analyze user behavior through session recordings and heatmaps.
High-performing stores regularly test different elements to improve conversions. A/B test product descriptions, pricing presentations, homepage layouts, and checkout processes. Even small improvements in conversion rate compound significantly over time when applied to consistent traffic volumes.
SEO deserves ongoing attention as organic traffic typically provides the highest return on investment long-term. Optimize product titles and descriptions for relevant search terms, build quality backlinks, and create helpful content that attracts potential customers. Working with specialists in Shopify eCommerce website design ensures your technical foundation supports long-term search visibility.
Managing Multiple Users and Permissions
As your business grows, you'll likely need team members to access your Shopify account. The number of staff accounts depends on your subscription plan, with Basic allowing two staff accounts, Shopify plan offering five, and Advanced providing fifteen.
Add staff members through Settings > Users and permissions. Assign specific roles that grant appropriate access levels without unnecessarily broad permissions. Roles include:
RolePermissionsIdeal ForStore ownerFull access to all settingsBusiness ownerStaff with limited permissionsSelected areas onlyContractors, part-time helpStaff with full permissionsEverything except billingFull-time managersStaff - OrdersOrder management onlyFulfillment teamStaff - CustomersCustomer data accessSupport team
Restrict financial information and theme editing to trusted team members only. Regular permission audits ensure former employees or contractors no longer have access. Enable two-factor authentication for all accounts to improve security, particularly for admin-level users.
Security Best Practices for Your Shopify Account
Protecting your Shopify account from unauthorized access preserves your business continuity and customer trust. Implement these security measures immediately after learning how to make a Shopify account.
Use a strong, unique password that combines uppercase and lowercase letters, numbers, and symbols. Avoid reusing passwords from other services, as compromised credentials from data breaches could grant attackers access. Password managers like 1Password or LastPass generate and securely store complex passwords.
Enable two-factor authentication (2FA) by following these steps:
- Navigate to Settings > Account
- Click "Enable two-factor authentication"
- Choose SMS or authenticator app method
- Follow the verification process
- Save backup codes in a secure location
Two-factor authentication requires both your password and a time-based code from your phone, dramatically reducing unauthorized access risk even if passwords leak. Authenticator apps (Google Authenticator, Authy) provide more security than SMS-based codes, which can be intercepted through SIM-swapping attacks.
Regularly review login activity through your account settings. Shopify logs all administrative actions, allowing you to identify suspicious activity. If you notice unfamiliar logins or changes you didn't authorize, immediately change your password, review staff permissions, and contact Shopify support.
Understanding Shopify's App Ecosystem
The Shopify App Store contains thousands of applications that extend your store's functionality beyond core features. Apps range from free utilities to premium subscriptions costing hundreds monthly, addressing nearly every eCommerce need imaginable.
Common app categories include email marketing, abandoned cart recovery, product reviews, inventory management, dropshipping integration, customer loyalty programs, and advanced analytics. While apps solve specific problems, installing too many degrades site performance and complicates store management.
Evaluate apps based on reviews, update frequency, support responsiveness, and pricing structure. Free apps often include branding or limited features, whilst paid apps typically offer more robust functionality and dedicated support. Trial periods let you test compatibility and effectiveness before committing.
Some apps require theme modifications or inject code into your storefront. Understand the technical implications before installation, and document all apps you install for future reference. When working with developers or agencies, this documentation prevents conflicts and simplifies troubleshooting.
Before adding functionality through apps, check whether Shopify's native features already provide what you need. The platform continuously adds capabilities that previously required apps, making some third-party solutions redundant. Regular reviews of your app stack identify unused subscriptions draining monthly costs without delivering value.
Financial Planning and Cost Management
Understanding the full cost of operating a Shopify store helps maintain profitability and prevents budget surprises. Beyond monthly subscription fees, consider transaction fees, payment processing costs, app subscriptions, theme purchases, and potential development expenses.
Shopify charges transaction fees on sales when using external payment gateways (2%, 1%, or 0.5% depending on plan). Using Shopify Payments eliminates these fees, but payment processing still costs 2.2% + 20p per transaction on the Basic plan, decreasing with higher tiers. These percentages directly impact margins, particularly on lower-priced products.
App subscriptions accumulate quickly, with popular stores often spending £100-500 monthly on various tools. Audit your app stack quarterly, removing unused or underperforming applications. Some apps offer annual billing discounts (typically 15-20% savings), worthwhile for essential tools you'll use long-term.
Factor in costs for product photography, copywriting, branding, and ongoing maintenance. Many UK merchants find that top eCommerce development companies provide better long-term value than attempting everything internally, particularly for technical implementations requiring specialized expertise.
Create a realistic budget that accounts for both fixed costs (subscription, essential apps, hosting) and variable costs (advertising, transaction fees based on sales volume). Understanding your break-even point helps set realistic sales targets and informs pricing strategies.
Creating your Shopify account marks the first step in building a profitable online business, but success depends on strategic decisions throughout setup and beyond. From selecting appropriate plans and themes through configuring payments and creating compelling product pages, each choice impacts your store's performance and customer experience. If you're launching a new store, redesigning an existing one, or need expert guidance on maximising your Shopify investment, Futur Media specialises in creating high-performing eCommerce stores for ambitious UK brands through conversion-focused design, custom development, and ongoing optimization.